Showing posts with label Metalwork. Show all posts

Friday, April 20, 2012

Some earrings finished!


Hey, I actually made something! 6 pairs of Sterling Earrings :) 
These are heading down to Behind The Monkey.
Pin It

Friday, March 23, 2012

Irregular Pendant

I've been meaning to make a silver version of the chunky copper pendant from my last post and I finally had a chance to do it.
This time I've used Sterling Silver Wire and it's on a smaller scale - The largest link is around 5cm x 3.5cm at it's widest points. (2 inches x 1 1.2 inches) Still, thats a pretty decent size for a silver pendant.

I like that you can rotate the shapes around in the jump ring bail to give it a different look. The top pic shows it in a uniform order then underneath it's pictured in a more haphazard arrangement.


My current quest is to create from the supplies I already have rather than buy in more materials. I've plenty of this Sterling Wire, so I can see some more of these coming on, maybe even earrings too!


Pin It

Saturday, February 04, 2012

Get Coppered?

No it doesn't have the same ring to it as "Get Silvered" does it? But lately I've been playing around a bit with copper and Brass.  What about "Brassed off"? Lol - no I think I'll stick with Get Silvered.

M. came in from the shed the other day and gave me a stack of nice thick copper wire. Each wire almost 3mm thick in 30cm lengths! Score! He salvaged it from work - it was a sample piece of Industrial cable that was going to be chucked out! There I was, thinking he was hiding in the shed playing with his fishing lures and reels when all the time he was stripping wire for me :)

We've had days and days of heatwaves lately with temperatures in the high 30s and even getting as high as 42 degrees (that's 107.6 degrees farenheit for the Celsius challenged!) Obviously, that's not the weather for soldering in a tin shed, especially when there are total fire bans.  So I waited patiently and courtesy of Cyclone Iggy out to sea further north we've had rain and even cloud cover and cooler temps in the last day or two. Of course I seized the opportunity to light up the torch -Here's the before and after shots. It's nice and chunky - The largest shape is around 8 x 4cm.


Pin It

Monday, January 23, 2012

Tiny Treasure Pendant

Before:

After:

This pendant was inspired by those gorgeous cylinder shaped Bali Silver Prayer Boxes. I've admired them for a long time.
For my pendant I used some copper pipe from the Hardware store, and used the same techniques that I used with my trinket boxes. I've plenty of spare pipe leftover - it was a 1.5 metre length and the pendant is only about 4 cm long. Overkill?? HaHa maybe! Anyway, I hope to experiment some more with the leftovers! I may try etching the next one, and I want to try out some kind of safety catch...and... if I get really adventurous I may try out a hinged version and....Oh well .....we'll see how I go.........     :) Pin It

Friday, January 13, 2012

Success or the opportunity to try again.....

How are your resolutions and goals going?
I'm on target so far - My housekeeping schedule is getting organised and I decided that as the house was spick and span that I'd treat myself to a day of metalwork today.

My plans nearly didn't happen as the postie delivered my late Christmas pressie to myself! I must say I have excellent taste when buying gifts for myself....


This is an awesome book with instructions for making all kinds of boxes and lockets as well as the hinges and catches. There's heaps of jaw dropping gallery pictures to inspire too!  But instead of sitting in the airconditioning reading all afternoon it inspired me to finish my second trinket box that I started last year at Tafe.

I had a few many soldering issues, then torch issues, but remembering Tim McCreight's comment in the book that there are only two outcomes - "success or the opportunity to try again" - I pressed on - trying again and again.......and again... until I finally got it right, all the while, ignoring my urges to go with third option which he never mentioned in the book which was to chuck the whole lot through the nearest window!
Heads up to my friends too - Carolyn for providing the copper pipe I used for the box and to Jane who suggested I check my torch tips for blockages. It did the trick!

Ta Da.....here it is:
 and opened:

and with my first box:
 

Specs for those interested: Copper & Sterling Silver - Its about 5cm (2inches) high including the dome and about 3.5cm (11/2inches) in diameter.

Pin It

Friday, December 02, 2011

End of an era - well that sounds rather dramatic....

"Life is what happens to you, while you're busy making other plans" John Lennon 

My year of study has come to an end. It happened over a month ago, but this is the first chance I've had to blog -  I've been filling  my time with other creative endeavours...........Hmmm, I wish.......I've actually been catching up on the housework, but it does make me somewhat happy to have a clean kitchen floor and a tidy linen closet ;)
I'm still waiting for my Cert 2 in Jewellery Manufacture to arrive in the mail. I've passed but I've been told not to hold my breath for the actual certificate to arrive. In the meantime I've done nothing creative! Despite my smug attitude about my kitchen floor and the sparkling bathroom tiles (did I mention the sparkling bathroom tiles?)  I thought that with the extra free day each week now the course has finished, that I'd be churning out magnificent jewellery creations, but no.....  it's pretty much been housework and the occasional half decent meal every now and then!
I still have my copper pipe trinket box to finish. It's probably only a half hour or so of work  to get to the clean up stage but the weather's hotting up here in Perth and soldering out in the tin shed isn't that appealing at the mo. And of course it's the "season to be merry" and lots of shopping, wrapping, decorating of trees, socialising and prep to do before Christmas. Yeah,  I know.....excuses, excuses!

To be continued.................


Pin It

Wednesday, October 12, 2011

Class countdown!

The Tafe year is nearly over for my course. I have mixed feelings - I'm looking forward to spending the time at home creating instead but really will miss the classes. And then there's the motivation issue when I'm at home - there's so many distractions: housework, shopping, washing, ironing and cooking.
I'm not saying I do them but the need to do them definately distracts me from the task of creating ;) Not to mention the biggest distraction of all - The Internet!!!
Anyway, we had a great day in class yesterday. A classmate is working on a new range and the teacher gave us all a lesson/demo in how to make a rubber mould. Jane was then able to use the mould and use the wax injector to reproduce her design in wax.

I took about 20 grams of scrap sterling in to class and melted it into an ingot then spent far too long (but I love doing it) rolling it down on the mill and then drawing it down into .8mm wire which I'll being using for earring hooks.

Another classmate Carolyn generously bought in some copper pipe for me to use for future trinket boxes. The teacher took us down to the metal workshop and we had it sliced on the cold metal bandsaw (at least I think that's what it was).
It took the metal workshop teacher a few minutes to do and will definately save me an hour, probably more of sawing. I'm always pleasantly amazed at the resources available at Tafe.

I also rolled down my ingot from last term a little more. I've decided I'll leave it now at about 1.5mm thick until I have a definate project in mind for the silver.


We also got the course info for next year. There's a possibility that we may be able to enrol in the Advanced Diploma as part time students and just do a few of the units. There's about 5 of us from this course interested in doing more.  Love to be able to do that if it fits in with all the other commitments I have, like family and the day job!

Now that the formal class projects are out of the way I have to plan what I want to do in class next to make the most of my last 3 classes............. 


Pin It

Tuesday, October 04, 2011

Brass Box Pictorial

Here are the pictures I took as I was making my little round Brass Box.
This isn't a tutorial (I wouldn't presume to try and tell anyone how to do this - I barely managed it myself !) It's more of a pictorial to show you my process - It was my first attempt to make a box and I'd be more than happy to hear suggestions if you know of a better or easier way to make these :)

I started with 1mm sheet brass which I formed and soldered into a 3cm diameter tube about 2 cm high....then:

I carefully sawed around the mark I had made with the calipers.
Yay! Two pieces - a lid and a base

Sand on flat surface in figure 8 action. I do this as required.
I used  a cardboard template and made an extended lining to fit lid .
Lining Soldered in - now checking for fit to the base.
Working on the Base now - Bottom soldered on.
Sawing off the excess
Shoddy Sawing! Lucky I enjoy filing :) Tweak the lid to fit!

That looks better - after filing & some sanding.
Aaargh! Never noticed that before - back to re solder that bit!
Working on the lid now- soldering the top on.
After sawing. You knew I'd textured the lid in the rolling mill, right?
Ready for more and more filing fun....and some sanding.
More clean up ...then.......All done - Here 'Tis
The Lid comes off...but it fits back on....phew - wipes brow! :)
Yep - I even cleaned up the inside.
This is just a brief summary but if you have a any questions just leave a comment and I'll be happy to give more details if I can. Pin It

Wednesday, June 29, 2011

Halfway There!

Week 20 Tafe:

I can't believe we are halfway through the year and the first semester is over already at TAFE. This week we were free to finish things off or do our own projects.

I did an anticlastic bangle. I don't have the right stakes or the right hammers to do this at home but wanted to have a go. It involved lots of  noise & hammering for most of the day and I went home with an aching arm....but I also went home with this - a  brass cuff. It's about 3.5 cm wide.The colour is from the constant annealing but I rather liked it so I just sanded and buffed up the edges for contrast and I'll just leave the oxidisation.


Towards the end of the day I made this open brass bangle. This was quick and simple as I cut it out with the guillotine. Now that would be a luxury to have one at home *dream*, then I drilled the holes quickly with the flex shaft. I got to use an oval steel mandrel which was a change  - at home I just have a very basic round wooden mandrel.
Now - 3 weeks break before the second semester. Hope to get a little bench time at home while we're on break. Pin It

Sunday, June 26, 2011

Lost Claws

Week 18 and 19 TAFE:

Sunday I attempted to re solder my bail to my claw setting. I did everything right and made a successful solder join........except the bail was a little crooked.......aargh - after I'd spent ages fiddling around to set it up, it had looked pretty straight to me pre flame!  So, I reheated to unsolder to start again, which worked fine........until I put it in the pickle and that's when things started to go downhill - the CZ went cloudy! Damn!
With nothing more to lose I set up to re solder it all again (maybe I could pretend my CZ was supposed to be frosted!) and that's when things went totally pear shaped! My poor little claw setting said "enough is enough" and melted.....right before my flame! (Actually it just popped apart - like a mini explosion)


This kind of wrecked my weekend. I sulked, I whinged about nothing going right - In short I transformed into a drama queen - but the upside is the family gave me a wide berth and my husband cooked a nice roast dinner that night! (there's always a silver lining - right?)

 I dragged my sorry arse to class and told my sad tale to the sympathetic teacher with some embarrassment. She gave me the choice of remaking, working on some other exercises or working on my own projects for the day.***.  Initially, I was all keen to remake but gave up on that idea after a few more frustrating hours. Instead I played with brass and the sandblaster. Now that was more fun!


*** Wondering why the teacher didn't make me complete another claw setting? Well, this is a pre apprenticeship level course and completing a claw setting was an extra project the teacher gave a few of us to stretch our skills - so it's not actually a requirement of the course, although it will be a personal challenge for me in the distant future :)
Despite the occasional frustrations above  - I'm still enjoying the course..... really  :)


Pin It

Saturday, June 18, 2011

Brassed Off!

Week 17 TAFE:

No photos - Suffice to say, all was going well with setting the CZ in the claw setting, until the end of the day when doing the final clean up....the bail parted company with the setting....what can I say?....I did a shoddy soldering job!  :(  Hopefully I'll be able to re solder carefully to fix it.....we'll see.......to be continued.

Moving on....at home this week I made some oversized earrings from huge brass discs on Sterling Ear wires. They're 5cm (2 inches) in diameter but they're not too heavy to wear as they're in a thinner gauge of metal. I had fun texturing the metal.

'Landscape' Convex discs - Roll printed with Aluminum mesh.

'Portrait' Convex' Discs - Roll printed with textured paper.

'Portrait' Concave Discs. Hammered Finish.


Pin It

Wednesday, June 08, 2011

Finish Clasp - check!

Week 16 Tafe:

Yesterday in class, I made a little bail for my soon to be CZ Pendant. It was gonna be a little rabbit ear bail but while annealing, the edges started to melt, so by the time I filed it back it didn't leave me with much room to saw out a triangle from the middle, (plus I was sort of over it) Now it's just going to stay the traditional bail shape. It's only about 6mm in width.


This modest little finding took me about an hour to make - it was a process of measuring, marking, sawing, annealing, bending, annealing again, nearly melting, bending again and filing.
This gave me a new appreciation for the Sterling Silver bails that I already had at home. They were handmade by Balinese Silversmiths...and were extremely good value at $1.16 each! :)

Then I moved on to finish the padlock clasp. Technically, it's not perfect but it looks OK and it works! I'm happy - I'd prefer that it was perfect(he he!)but I remind myself frequently that I'm a Cert 2 student (pre apprenticeship level)I'm not doing an apprenticeship or the diploma course, and at least I now know in theory how it should be done perfectly! Maybe if there's a next time.........


Pin It

Monday, June 06, 2011

Moving on!

Week 15 TAFE:

Our teacher has moved us on to a new project. So this week we started a prong setting.
The padlock clasp hasn't been abandoned - just put aside. I quite like working on a couple of projects at once. While one project is in the pickle, I can be filing the other item or whatever. It mixes it up a bit so things don't get boring....and I'm happy to have a little break from the padlock clasp.

It was left up to us whether we wanted to do a 6 or 4 prong setting for our 6mm cubic zircona and I opted for a 4 prong setting. Yes, it was a cop out the easier option but I want to walk before I run ;)
What I find the most challenging is working on such a small scale. I realize that a 6mm stone is a decent size stone (especially if it was a diamond!) but even so, working on the setting is still very fiddly work, and I'm full of admiration for those that set teensy 1mm stones.


Pin It

Thursday, June 02, 2011

Progress report on the clasp from hell.... ;)

Week 13 & 14 at TAFE:

Both TAFE days I've been working on the padlock clasp which is proving to be a challenge. I did some work at home on the weekend and soldered the chain links of the bracelet, and while I was at it, I thought I'd just solder the top plate to the base of the padlock clasp while I was at the bench: easy peasy - a five minute job...after all it's just a variation of a hollow form and I've churned a couple out with not too many issues since I learnt the technique ......Aha! - what naive optimism - It was actually A PITA that took 4 attempts!

The top is very gently domed and there was one little section where the top just wouldn't solder to the wall of the piece, although when it was all bound up pre soldering it looked like it was all flush and connected OK. Despite me trying the troubleshooting tips from the teacher(filing & gentle hammering of the edges) I still had a tiny hairline section that just wouldn't connect!

Stick soldering saved the day - something I don't usually do because I'm not too good at this and I find that I flood too much solder on the piece when I solder this way. Anyway this time that was a good thing (yay!) and it filled the 'gap'! Now there's just this small matter of extensive firescale to address LOL!
Many jewellers will tell you that solder will not fill a gap. Bearing this in mind it's quite possible that my problem wasn't so much a gap. It may have been that the section was dirty or perhaps contaminated by pickle, which prevented the solder from flowing in that spot. Who knows? Anyway it's all fixed now!

In class I prepared the arm which I soldered on to a little hand formed tube, it had to be hardened, filed, annealed and turned up and soldered. I had to "fit" it to the body, working out the placement of the holes in the wall,which I drilled, burred & filed out ready to take the arm and be riveted in place......which is what I'll be doing next week in class!


Pin It

Friday, May 27, 2011

Rain drop Pendant

I've entered my latest creation in an online exhibition which will be hosted on the ganoksin Orchid forum. The pieces must be made with non precious metals, so that suited me as I've been making my hollow form pieces in Brass.
The exhibition's not juried, so I know my piece will make the cut, what's tricky is the photo - it must be of "jury quality"
Here's the picture I've submitted.


Hopefully it meets the standard required. Photographing jewellery is quite painful for me, anything polished has reflection - usually reflecting features I don't want included, like my hand or what I'm wearing (the pink pyjama syndrome) Aargh! then there's the "evil" white balance that makes the purest snow driven whites a dirty blue gray tone despite my hours messing around with my camera settings.
That's why I shot my pic on a gray background this time - I decided to save my self the white balance angst :)

There are numerous online articles showing how to make light boxes and to take great photos of jewellery, maybe I'll check out the resources and have a go at making a light box.

Update: Got the news that my photo was Ok and up to standard - Yay! Pin It

Friday, May 20, 2011

New Tools - jury is out.........

First up Week 12 at Tafe: I still have to solder last week's jumprings into a bracelet but this week we started working on the clasp. A hollow form padlock clasp - it's still a work in progress. Once again we rolled our silver sheet down from a little section of bar ingot.

It's satisfying learning to fabricate materials on the spot as needed instead of keeping all the different gauges of sheet and wire on hand. Although if I was doing it this way at home I'd definitely need to get quicker at it...oh and I'd need a better rolling mill, oh and draw plates etc etc -He He :)


In other happenings - The Aussie dollar is pretty healthy and the silver price dropped back from it's near $50 high so it was time for a bit of internet shopping.
Apart from materials that I actually needed, I also splurged $20(aud)on a new tool.
Rocket wire twisting pliers :)


They held a lot of promise but alas, I was a tad disappointed after giving them a test run! Check out the video instructions on how they work.
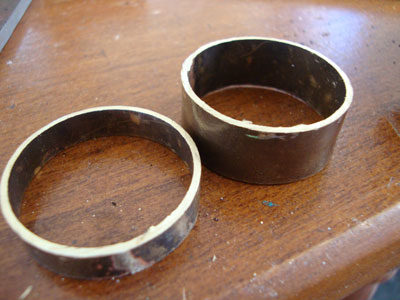
I tested them on 16 gauge square copper wire but I found it impossible to close the handles to secure the wire. I had to squeeze the handles in my vice, as I didn't have the wrist strength, hmm - what a weakling! Anyway I did twist a few 13cm (about 5 inch) lengths of wire. They twisted evenly and I soldered them into rings to make this pendant.


Next up - some square silver 18 gauge. A 60 cm (2 feet)length just didn't twist evenly. You can see a couple of the pieces in the photo above next to the pliers. I ended up cutting it into shorter bits to try and salvage it. That did the trick (sort of) and I made this:


My conclusion: I should have googled a bit more before I bought these. Apparently the pliers are good for wire up to 18 gauge (1mm), so it was no wonder I had trouble with the 16 gauge copper. I haven't tried twisting 2 strands of round wire to make twisted wire yet but the video makes it look easy.
I think I'll use them occasionally in the future but honestly a hand or power drill and a vice will do the same job, so I probably could have lived without these and saved my 20 bucks. However these pliers do get a 10 out of 10 for their good looks.
They look pretty damn cool in the tool drawer.

I don't think I've experienced "tool remorse" before - LOL ....What tools have you purchased that have underwhelmed you? Pin It

Wednesday, May 11, 2011

New Term, New Design Books!

Week 11 - Back to Class yesterday after a two week break. This term we'll do more on design and also learn various findings. To really get us comfortable with soldering we will be making a chain bracelet and fabricating a locket style clasp.
We started today with a 6mm ingot of silver and rolled it down in the rolling mill, then used the draw plates to get it down to 1.5mm wire. Then we formed and sawed our jumprings ready for lots of soldering!
Not really a lot to show for the days work - we were hanging around a bit, waiting for a free Rolling mill and draw plate - there was a bit of a traffic jam! 


Waiting at home after class were some books I'd ordered from Dover Publications. Got to love those copyright free images they sell! One of the books  is full of vector border and frame designs. I'd thought they'd be some good metal etching designs in them. Happily there is but a few of the designs are suitable for saw piercing too.


So, this morning I got some sawing and piercing practise in using one of the frame designs. I'm kicking myself now for not doing it in a thicker gauge of sheet. It turned out OK, I still have a bit of tidying up to do on it,  but it's a bit flimsy (22gauge) to use in jewellery unless I attach it to a back plate or something. I do like it though so will have another go later in 1mm (18gauge) sheet.

Pin It