Showing posts with label brass. Show all posts

Tuesday, October 04, 2011

Brass Box Pictorial

Here are the pictures I took as I was making my little round Brass Box.
This isn't a tutorial (I wouldn't presume to try and tell anyone how to do this - I barely managed it myself !) It's more of a pictorial to show you my process - It was my first attempt to make a box and I'd be more than happy to hear suggestions if you know of a better or easier way to make these :)

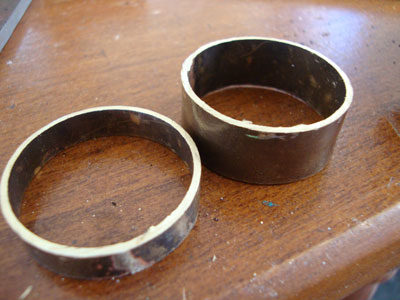
I started with 1mm sheet brass which I formed and soldered into a 3cm diameter tube about 2 cm high....then:

I carefully sawed around the mark I had made with the calipers.
Yay! Two pieces - a lid and a base

Sand on flat surface in figure 8 action. I do this as required.
I used  a cardboard template and made an extended lining to fit lid .
Lining Soldered in - now checking for fit to the base.
Working on the Base now - Bottom soldered on.
Sawing off the excess
Shoddy Sawing! Lucky I enjoy filing :) Tweak the lid to fit!

That looks better - after filing & some sanding.
Aaargh! Never noticed that before - back to re solder that bit!
Working on the lid now- soldering the top on.
After sawing. You knew I'd textured the lid in the rolling mill, right?
Ready for more and more filing fun....and some sanding.
More clean up ...then.......All done - Here 'Tis
The Lid comes off...but it fits back on....phew - wipes brow! :)
Yep - I even cleaned up the inside.
This is just a brief summary but if you have a any questions just leave a comment and I'll be happy to give more details if I can. Pin It

Wednesday, June 29, 2011

Halfway There!

Week 20 Tafe:

I can't believe we are halfway through the year and the first semester is over already at TAFE. This week we were free to finish things off or do our own projects.

I did an anticlastic bangle. I don't have the right stakes or the right hammers to do this at home but wanted to have a go. It involved lots of  noise & hammering for most of the day and I went home with an aching arm....but I also went home with this - a  brass cuff. It's about 3.5 cm wide.The colour is from the constant annealing but I rather liked it so I just sanded and buffed up the edges for contrast and I'll just leave the oxidisation.


Towards the end of the day I made this open brass bangle. This was quick and simple as I cut it out with the guillotine. Now that would be a luxury to have one at home *dream*, then I drilled the holes quickly with the flex shaft. I got to use an oval steel mandrel which was a change  - at home I just have a very basic round wooden mandrel.
Now - 3 weeks break before the second semester. Hope to get a little bench time at home while we're on break. Pin It

Sunday, June 26, 2011

Lost Claws

Week 18 and 19 TAFE:

Sunday I attempted to re solder my bail to my claw setting. I did everything right and made a successful solder join........except the bail was a little crooked.......aargh - after I'd spent ages fiddling around to set it up, it had looked pretty straight to me pre flame!  So, I reheated to unsolder to start again, which worked fine........until I put it in the pickle and that's when things started to go downhill - the CZ went cloudy! Damn!
With nothing more to lose I set up to re solder it all again (maybe I could pretend my CZ was supposed to be frosted!) and that's when things went totally pear shaped! My poor little claw setting said "enough is enough" and melted.....right before my flame! (Actually it just popped apart - like a mini explosion)


This kind of wrecked my weekend. I sulked, I whinged about nothing going right - In short I transformed into a drama queen - but the upside is the family gave me a wide berth and my husband cooked a nice roast dinner that night! (there's always a silver lining - right?)

 I dragged my sorry arse to class and told my sad tale to the sympathetic teacher with some embarrassment. She gave me the choice of remaking, working on some other exercises or working on my own projects for the day.***.  Initially, I was all keen to remake but gave up on that idea after a few more frustrating hours. Instead I played with brass and the sandblaster. Now that was more fun!


*** Wondering why the teacher didn't make me complete another claw setting? Well, this is a pre apprenticeship level course and completing a claw setting was an extra project the teacher gave a few of us to stretch our skills - so it's not actually a requirement of the course, although it will be a personal challenge for me in the distant future :)
Despite the occasional frustrations above  - I'm still enjoying the course..... really  :)


Pin It

Thursday, April 14, 2011

Hollow form Fun.

I ordered some1 mm brass sheet so I could try out some more hollow form shapes, similar to my week 4 efforts. It arrived this week.
Couldn't wait to get started on Wednesday. Pretty much the wall is constructed first then it is soldered to a slightly larger textured bottom plate. Then the excess is sawn and filed off, so the join doesn't show.
There must be a hole in it somewhere before the top plate is soldered on to allow the heat and gases to escape and avoid a hot metal explosion! So I measured out and drilled my holes for the chain at this point then soldered on the top. After more sawing, filing and sanding and it was all finished! Easy peasy :) Well, it's sounds easy but in real life it took me the best part of the day to do! Hopefully after I've done a few more of these I'll get my production time down a bit!


I'm loving the texture too. It's from a fibrous scrapbooking paper. Reminds me of Leather ;) Pin It

Saturday, February 23, 2008

Another 3D tri-metal pendant

I had so much fun making the rectangle 3D pendant the other day, that I made another one. This time in a circle shape which I die cut... a little faster than the hand sawing. I used a silver bead instead of the pearl this time. I've got this one up in my Etsy Shop.


Pin It

Thursday, July 12, 2007

YOJ - Weeks 25 & 26


Playing catch up on the Year Of Jewellery this week. Top pair of earrings is Sterling Corrugated Squares. I really love making this stuff - it's so much fun and has been getting a good reaction and happily a few sales down at my sister's shop.

Bottom pair are a simple die cut brass pair teamed with black rubber and black rivets. Pin It

Wednesday, July 11, 2007

Week 24 - Copper & Brass Earrings


I've been making lots of jewellery lately. The four pairs of earrings above are part of the stock that's gone down to my sister's shop mentioned in my previous post.
I've used my disc cutter to cut the discs but the earrings took ages to finish as I handpolished them all. I must start using my dremel for the polishing, but that would mean heading out into the shed and at least if I'm handpolishing it's not as messy and I can stay inside near the heater and watch TV as I go. Pin It

Wednesday, May 23, 2007

YOJ - Week 20 Bow Necklace

Not on theme again this week and I'm late as well. I had a play with the jewellery saw again this week. I really enjoy cutting out shapes from sheet metal and this week I went with a ribbon bow.
This is Mark 2. With the first one, I soldered a tube on the back and was going hang it on neoprene as I like the effect of the unseen bails. Unfortunately the soldering annealed the brass and made it too soft. Then when I was polishing it up I bent it. I managed to bend it back with out it being noticable but decided to work harden it with my rawhide mallet on the bench block to prevent it happening again.
What a pain! The tube on the back was getting in the way so I had it half off and half on the bench block. Then the edge of the bench block left a nice mark in the metal. That's when I gave up on that one and decided to start again!
This time round I took the easy way out suspended it from chain through a hole either side of the bow.
I'm pretty over ribbons and bows at the moment though ;) Pin It